Creating a form
Creating a form is as simple as creating a new post in WordPress, then setting the form as the location for one or more field groups. This document outlines form creation via the UI. For information on creating forms via code, see Registering forms programmatically.
To create a new form
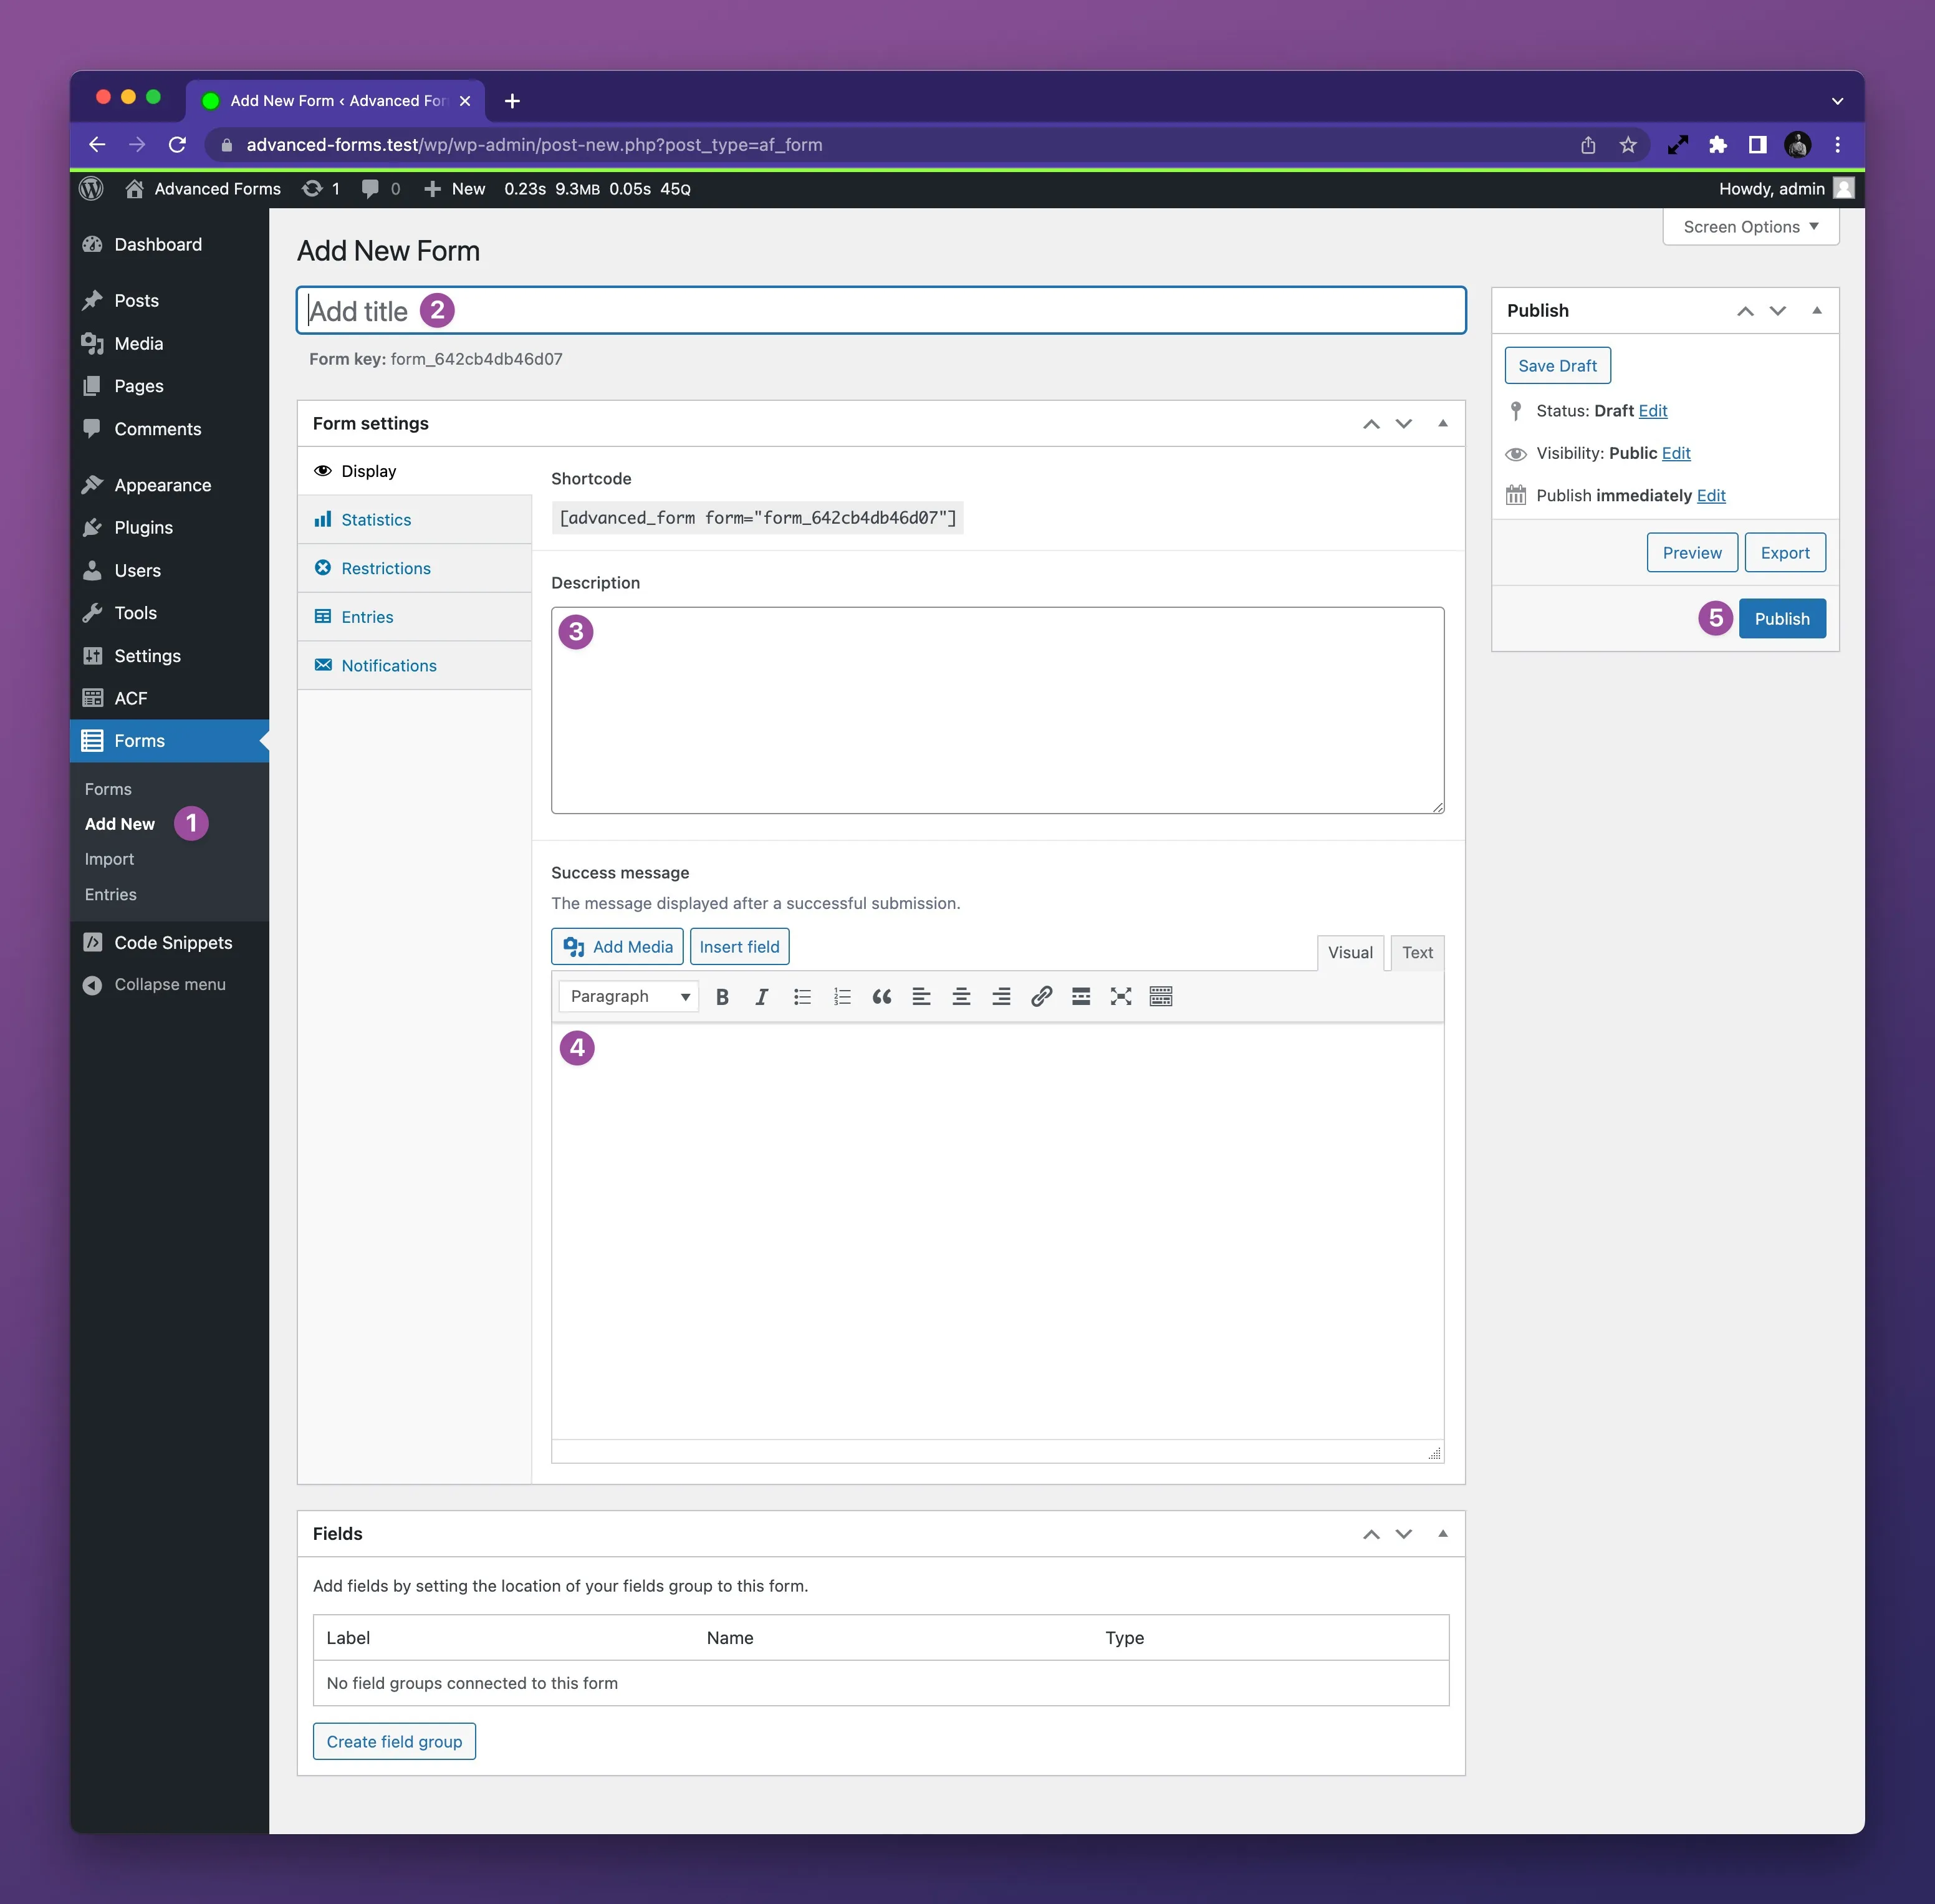
Section titled “To create a new form”- Navigate to the WordPress admin and under the Forms menu, click Add New.
- Enter a name for the form.
- Optionally enter a description for the form.
- If you wish to show a success message after the form is submitted, enter the message in the Success message field.
- Click the blue Publish button to save the form.
Configuring a field group to render on the form
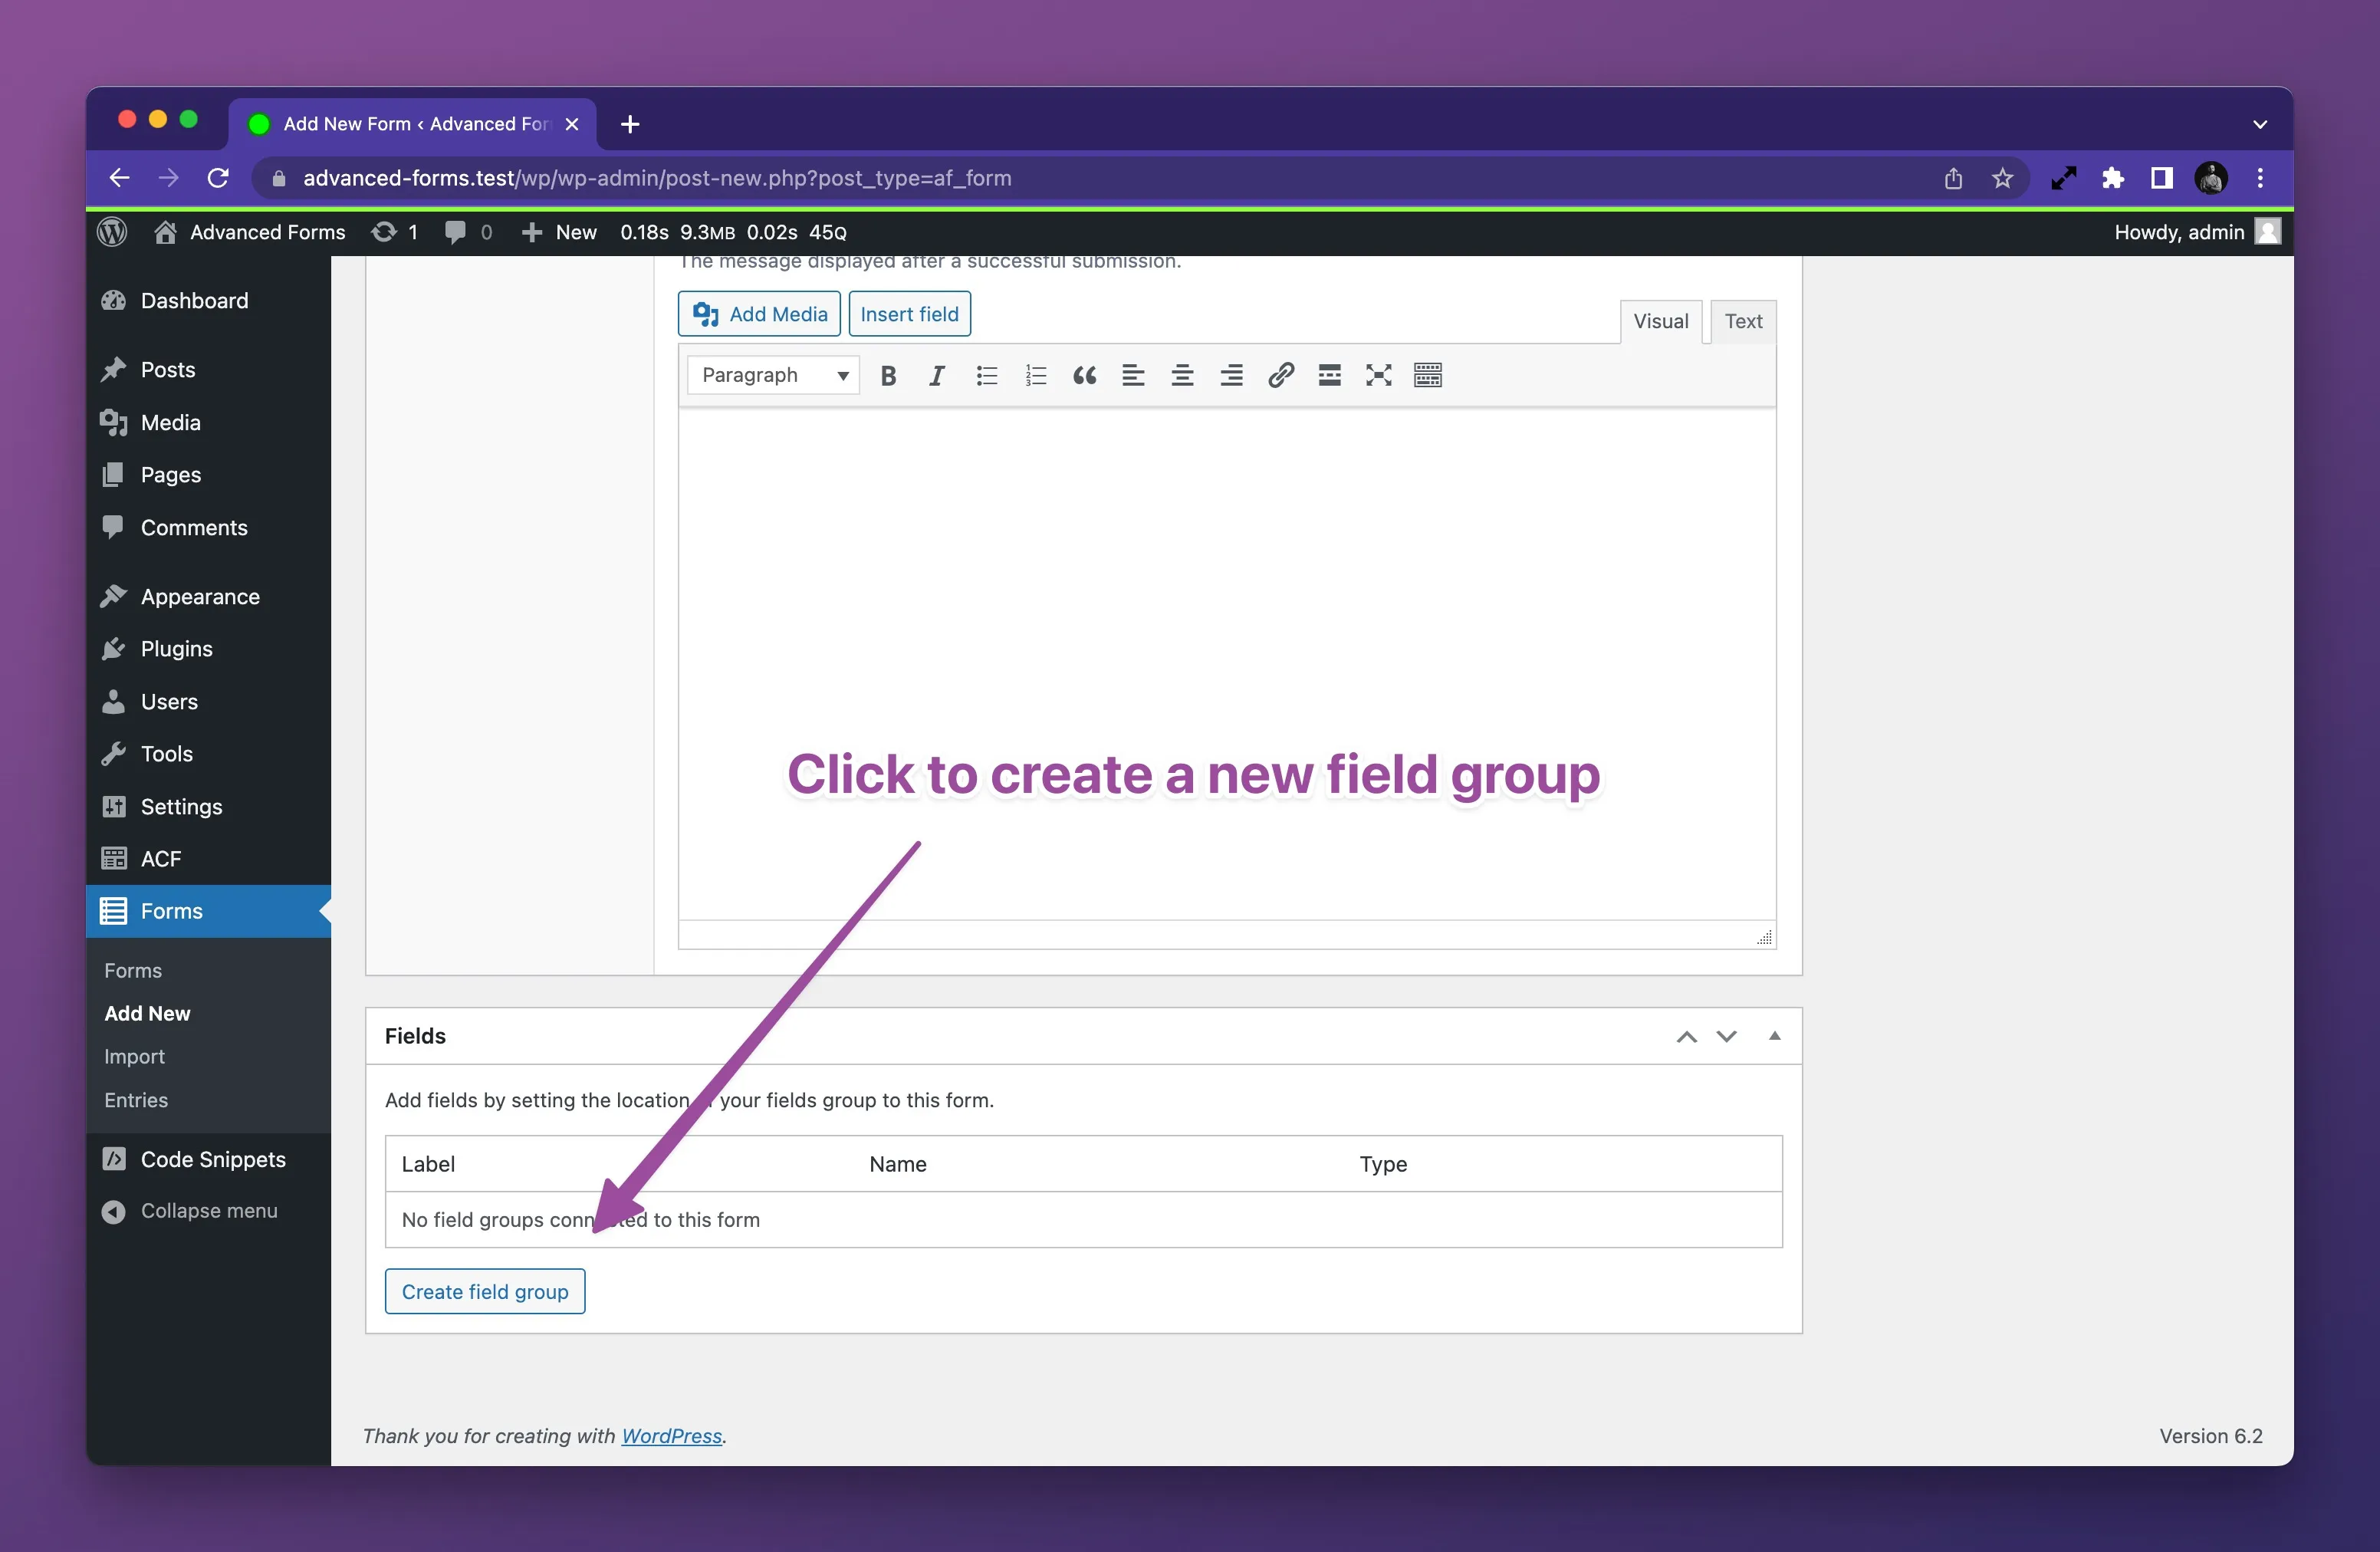
Section titled “Configuring a field group to render on the form”At this point, you have an empty form with no fields. To add fields to the form, you need to set the form as the location for one or more field groups.
Creating a new field group for the form
Section titled “Creating a new field group for the form”You may create ACF field groups as you normally would using the ACF > Field Groups screen. However, you can also create a new field group directly from the form edit screen using the Create field group button in the Fields metabox:
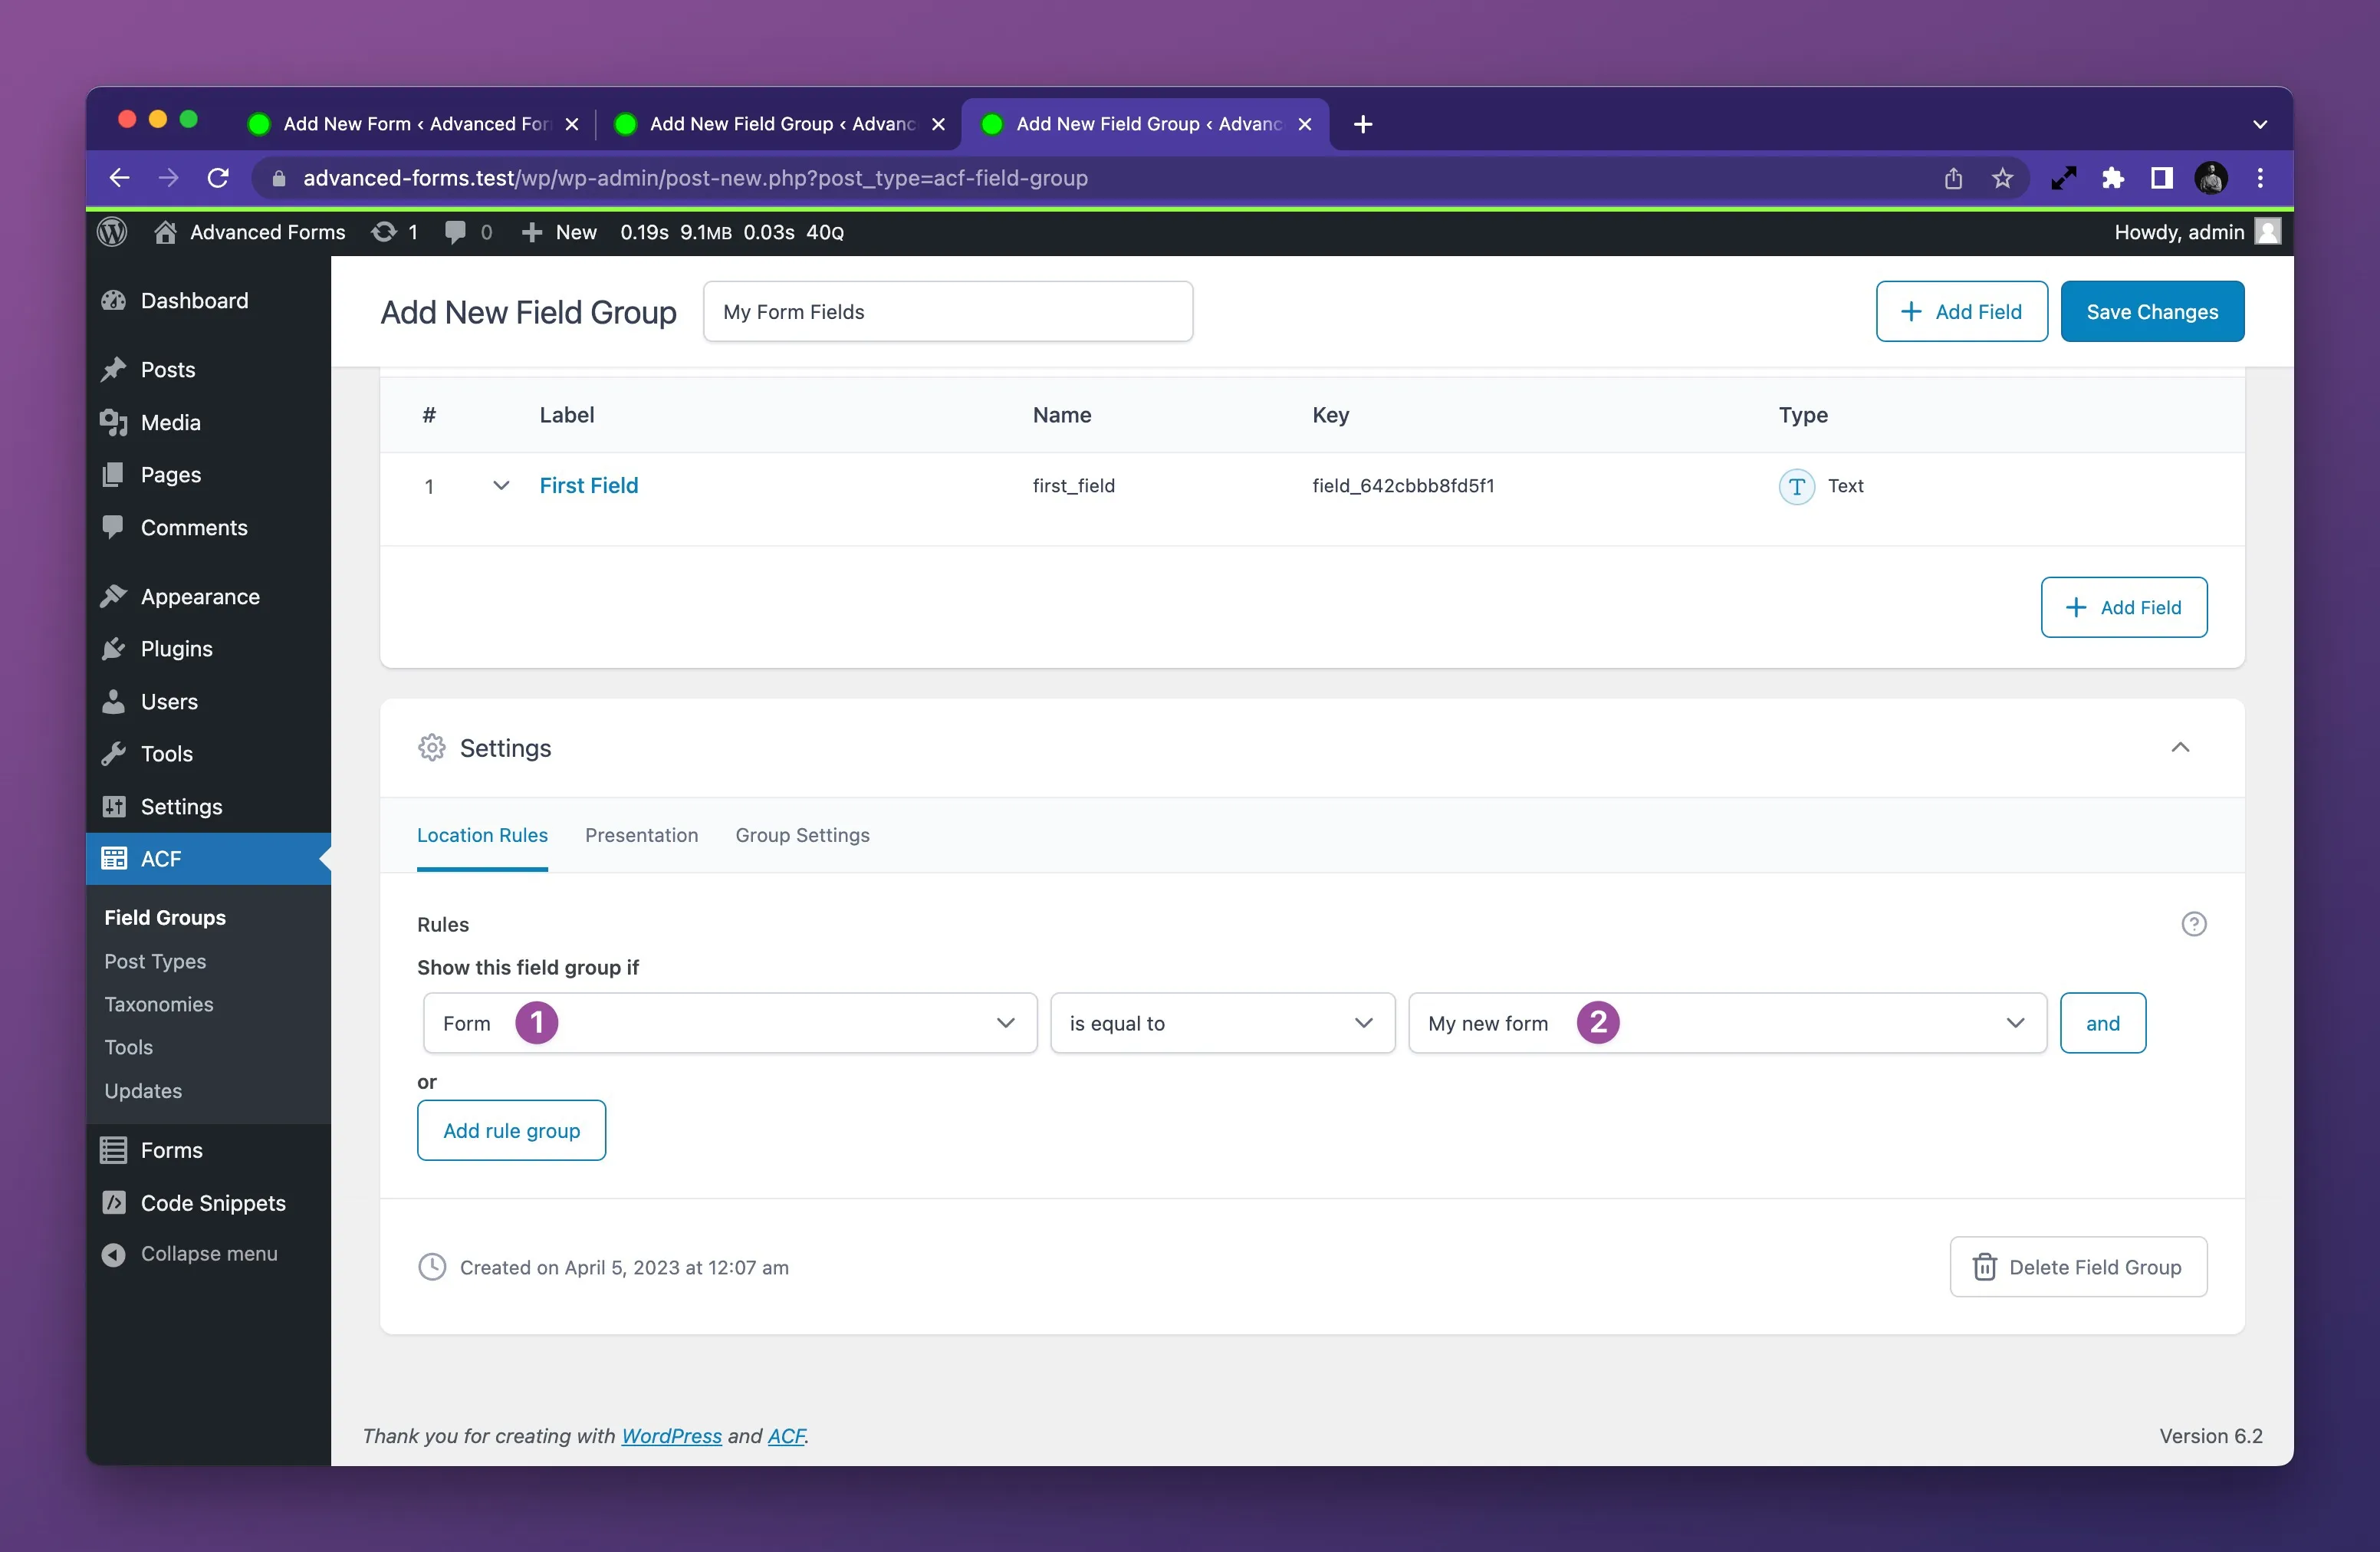
Connecting an existing field group to the form
Section titled “Connecting an existing field group to the form”Once you have a field group created, you can set it to render on the form by selecting Advanced Forms > Form in the field group’s Location Rules settings and then selecting the form from the resulting list:
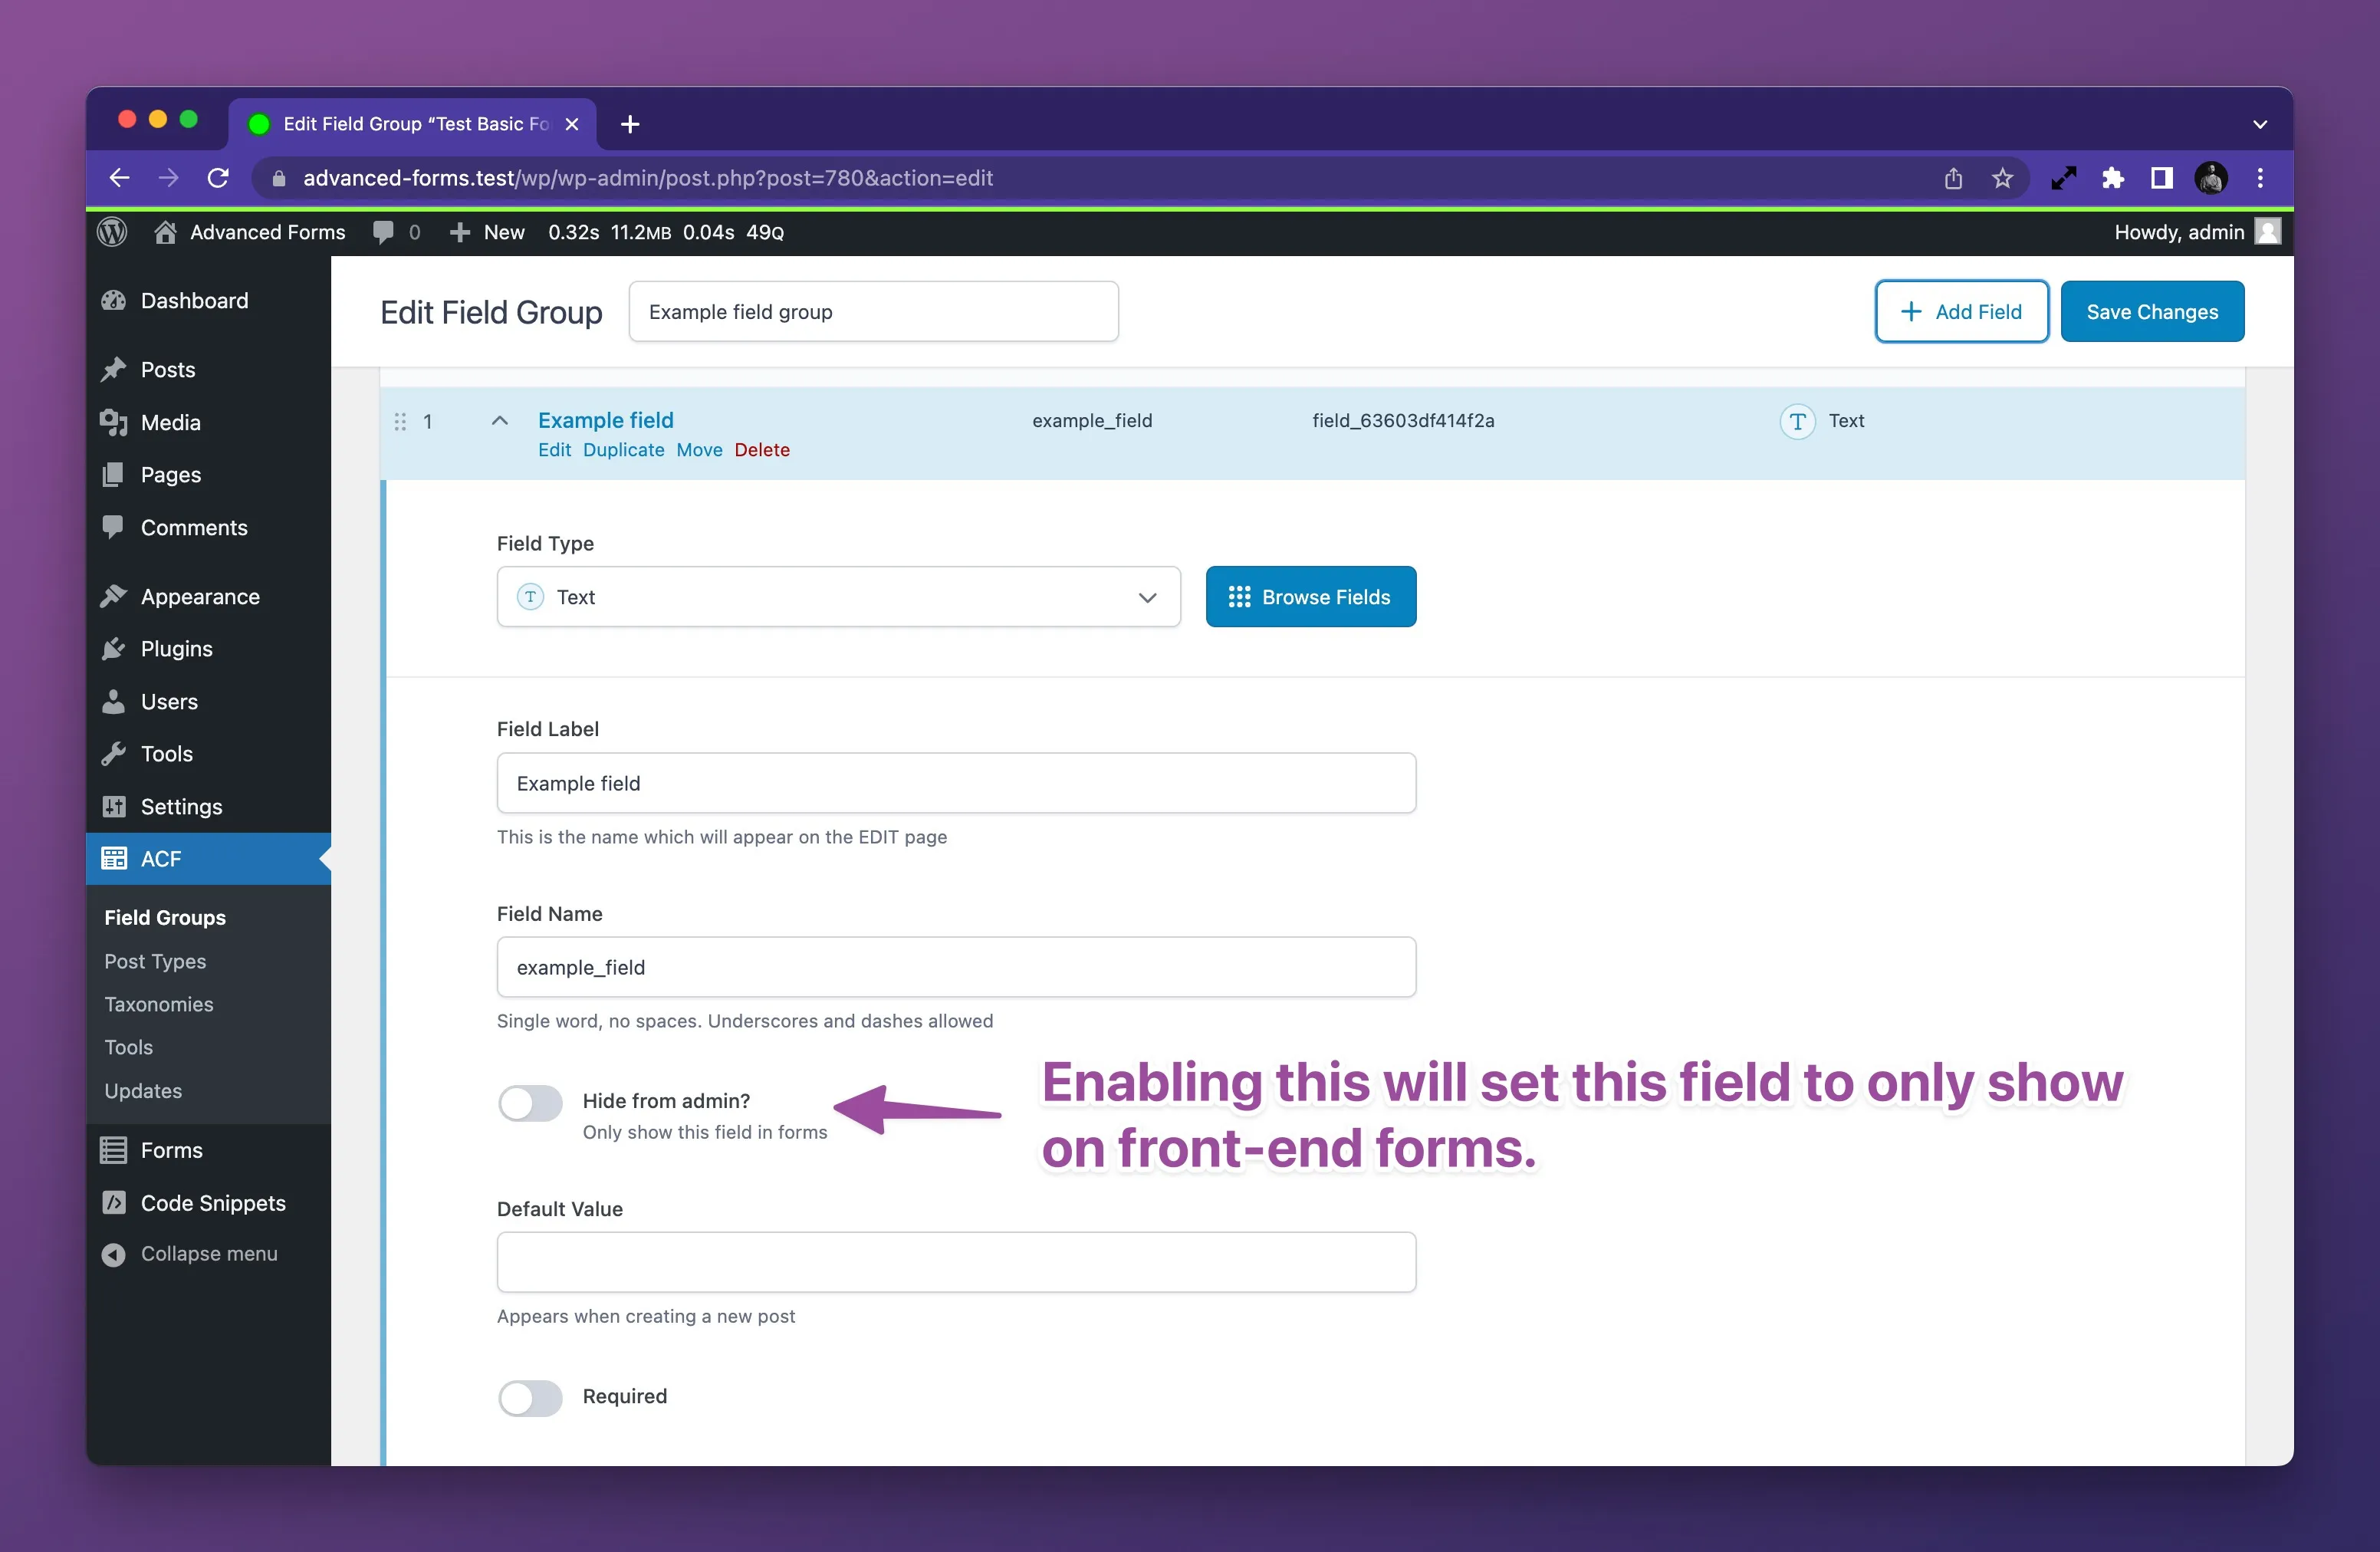
Setting fields to appear in forms only
Section titled “Setting fields to appear in forms only”If you are using a field group on both a form and another location in the WordPress admin, you may wish to hide some fields that are intended for the form only. To do so, you may use the Hide from admin setting added to fields in the field group edit screen: